How to use Truelist with Clay.com
Here’s a guide on how Clay.com users can utilize Truelist’s API for email validations on the Clay platform:
Step-by-Step Integration Guide
- Generate a new API key for Clay.com in your account
- Log in to your Truelist account.
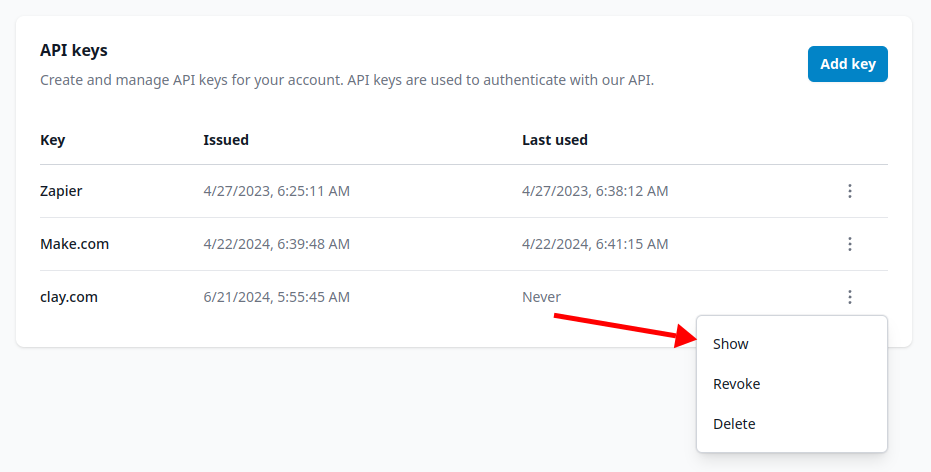
- Go to the API Keys page and click “Add Key” to create a new API key. Name the key something like “Clay.com Integration”.
- Then, find the key you just created in the list. Click the 3 vertical dots, then click “show” to reveal the key.
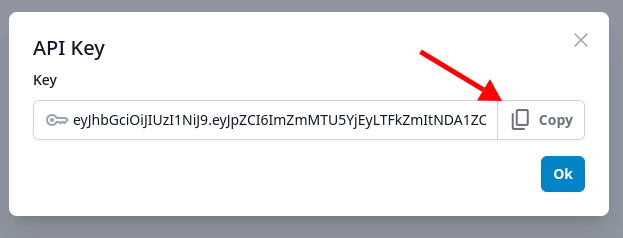
- Copy the key to your clipboard using the Copy button:
- Set up a HTTP API column in a Clay.com table
- Log in to your Clay.com account.
- Create a new table or open an existing table.
- Add a new column to the table and select the “HTTP API” column type.
- Set up the HTTP api as shown below:
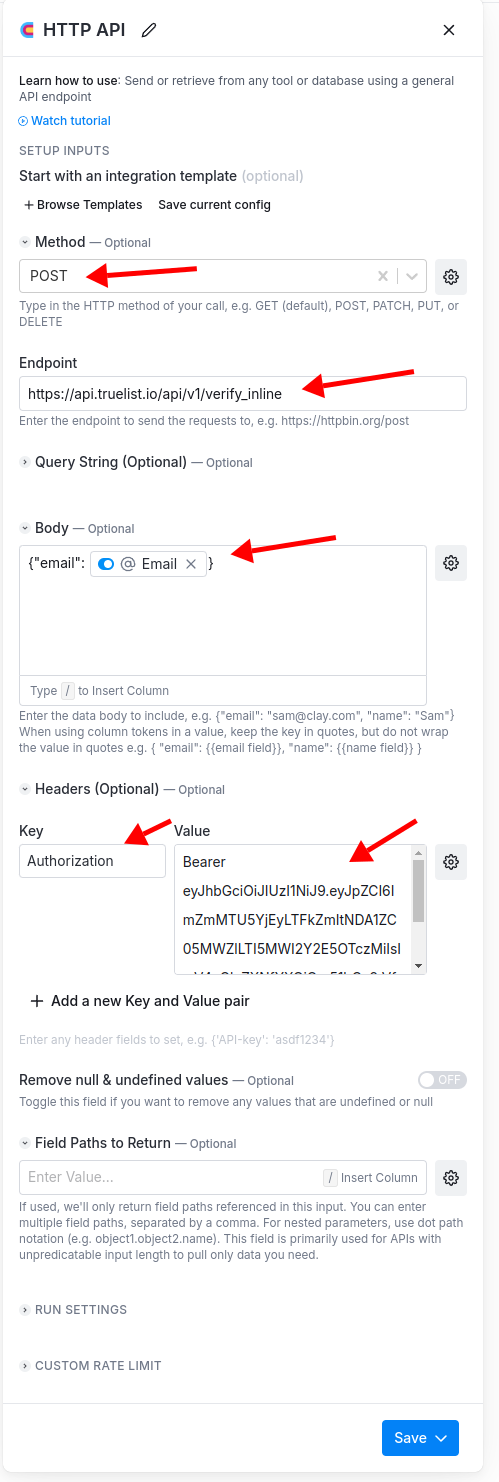
- Set the method to
POST - Set the endpoint to
https://api.truelist.io/api/v1/verify_inline - The Body will need to be
{ "email": "{{email}}" }. Replace{{email}}by typing/and selecting the email column from the dropdown. You did it right if it looks like it does in the above screenshot. Dont’t forget the curly brace}at the end! - You’ll need a header:
- Key will be
Authorization - Value will be
Bearer <your-api-key>. Replace<your-api-key>with the API key you copied from Truelist.
- Key will be
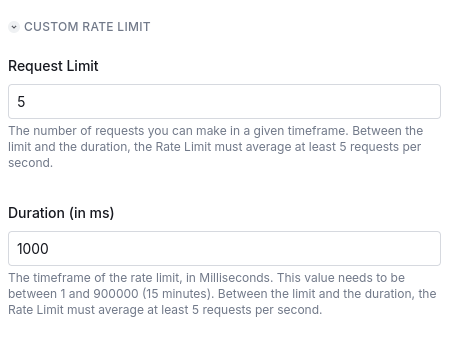
- Set the rate limit:
- Set the Request limit to
5. - Set the Duration (in ms) to
1000.
- Set the Request limit to
- Click Save to save the column.
- You can then click the play button (Run column) to validate the email addresses in your table.
A note on rate limiting
If you are on the Growth plan, you’ll likely see some errors related to rate limiting. Rate limits are built into our plans. Simply click the play button on the column again to retry the requests that failed, until all of the emails have been validated.
- Add columns that include the verification results to your table
- On the http api column, click the play button on one of the rows (each row should say
200). You’ll be presented with a Cell Details screen:
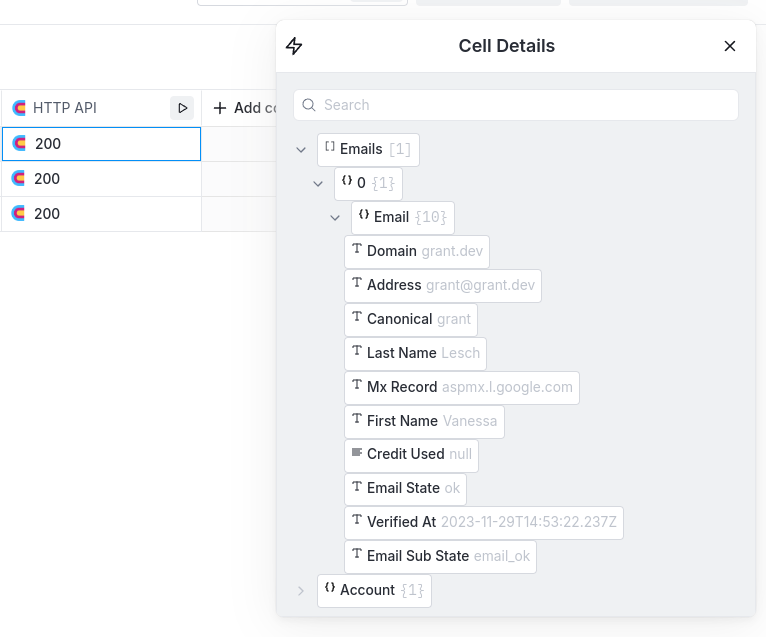
- Truelist returns 2 email states in the response that you can add as columns to your table:
Email State- This is the overall validation result of the email address. Possible values areok,risky,invalid, andunknown.Email Sub State- A more detailed validation result. Possible values areemail_ok,accept_all,is_disposable,is_role,failed_mx_check,failed_smtp_check,failed_spam_trap,failed_no_mailbox,failed_greylisted,failed_syntax_check.
These states are described in detail on this page: Understanding Verification Results.
For these email states, you can hover over them and click Add as column to add them to your table.